Sphinx to GitHub Pages via GitHub Actions
This article will cover the full process to document your code with Sphinx to GitHub pages via GitHub-actions in 2 main sections :
- How to Create Sphinx Documentation in Python
- How to automatically create and deploy to GitHub pages via GitHub actions

Clone the repo used in this article : https://github.com/RGGH/jubilant-lamp
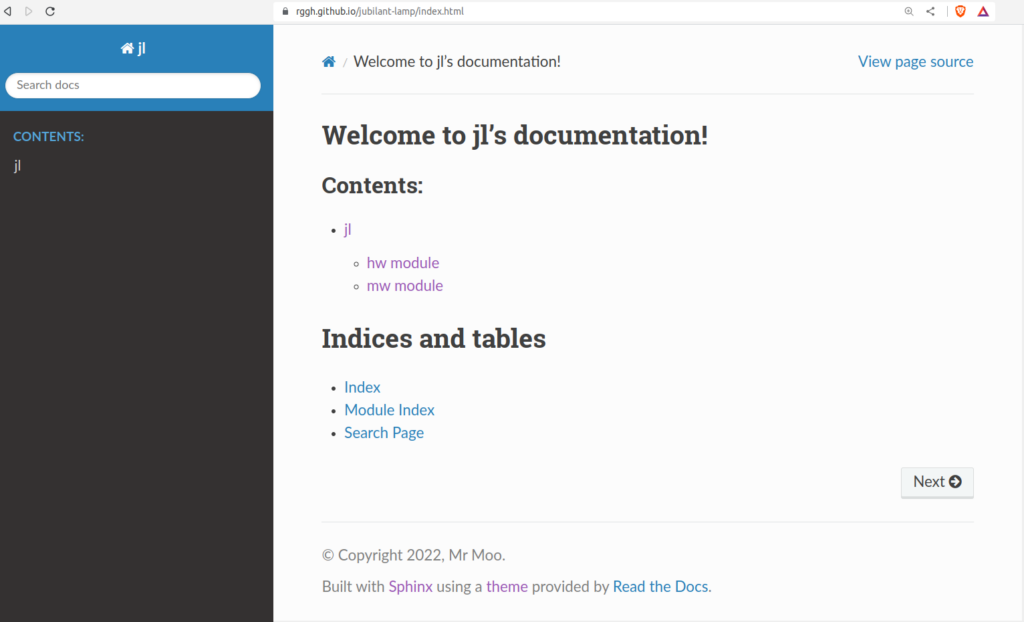
View the Sphinx generated documentation from this project here on GitHub pages: https://rggh.github.io/jubilant-lamp/
What is Sphinx?
“Sphinx is a documentation generator written and used by the Python community. It is written in Python, and also used in other environments.” ~ wikipedia
What are GitHub Actions?
You can configure a GitHub Actions workflow to publish your Sphinx documentation when changes are pushed to a specific branch to publish your site. GitHub actions are available once you have created a workflow.
Read more here on how to create a workflow
# This is a basic workflow to help you get started with Actions

name: Build-sphinx-docs

# Controls when the workflow will run
on:
  # Triggers the workflow on push or pull request events but only for the main branch
  push:
    branches: [ master ]
  pull_request:
    branches: [ master ]

  # Allows you to run this workflow manually from the Actions tab
  workflow_dispatch:

# A workflow run is made up of one or more jobs that can run sequentially or in parallel
jobs:
  # This workflow contains a single job called "build"
  build:
    # The type of runner that the job will run on
    runs-on: ubuntu-latest

    # Steps represent a sequence of tasks that will be executed as part of the job
    steps:
      # Checks-out your repository under $GITHUB_WORKSPACE, so your job can access it
      - uses: actions/checkout@v2

      - name: Set up Python 3.10
        uses: actions/setup-python@v2
        with:
           python-version: "3.10"
      # Runs a single command using the runners shell
      - name: Run a one-line script
        run: echo Hello, world!

      - name: Install dependencies
        run: |
          python -m pip install --upgrade pip
          pip install -r requirements.txt
      - name: Build HTML
        run: |
          cd docs/
          make html
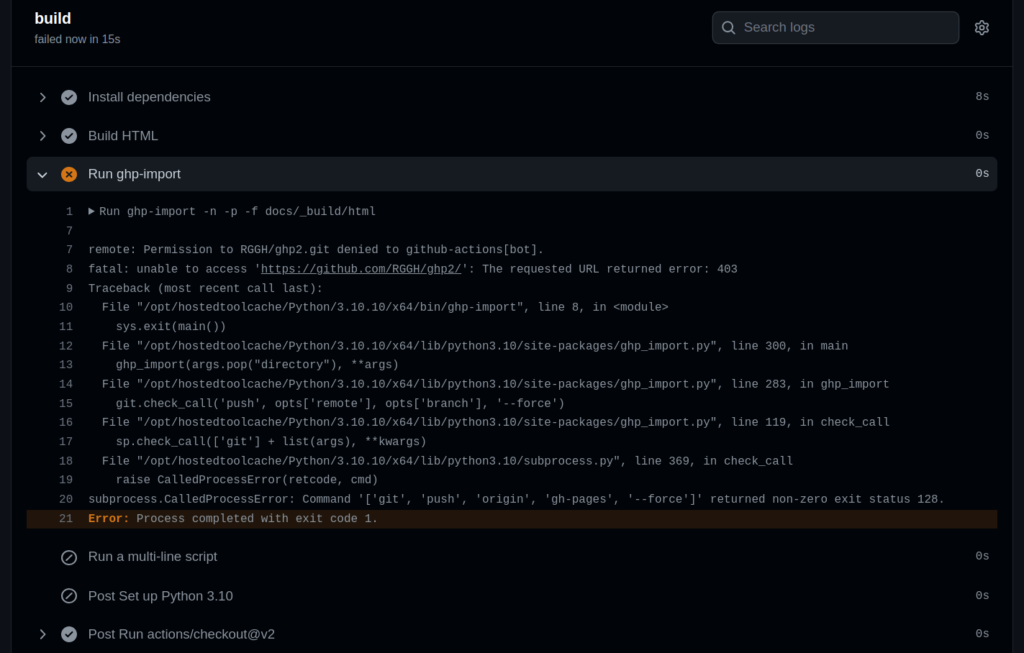
      - name: Run ghp-import
        run: |
          ghp-import -n -p -f docs/_build/html

      # Runs a set of commands using the runners shell
      - name: Run a multi-line script
        run: |
          echo Add other actions to build,
          echo test, and deploy your project.
Credit : https://github.com/niketagrawal for the yaml file
The yaml file
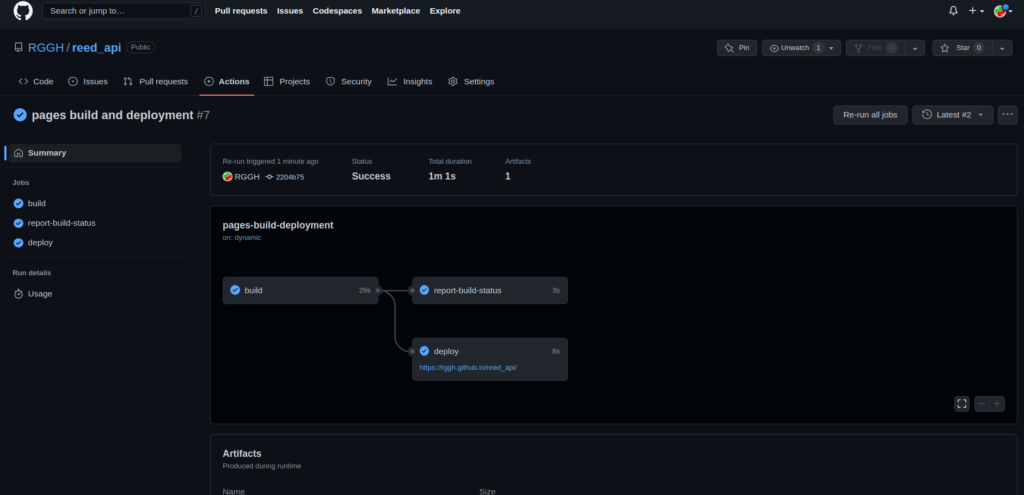
Inside this file you can see that the GitHub action starts an ubuntu vm and uses “ghp-import” which imports your generated html into GitHub pages.
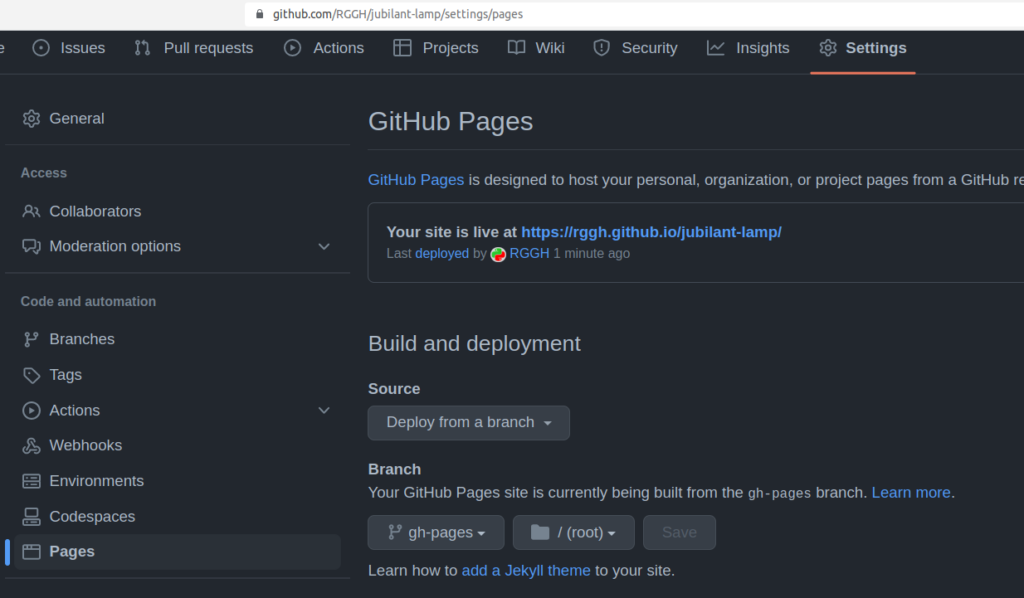
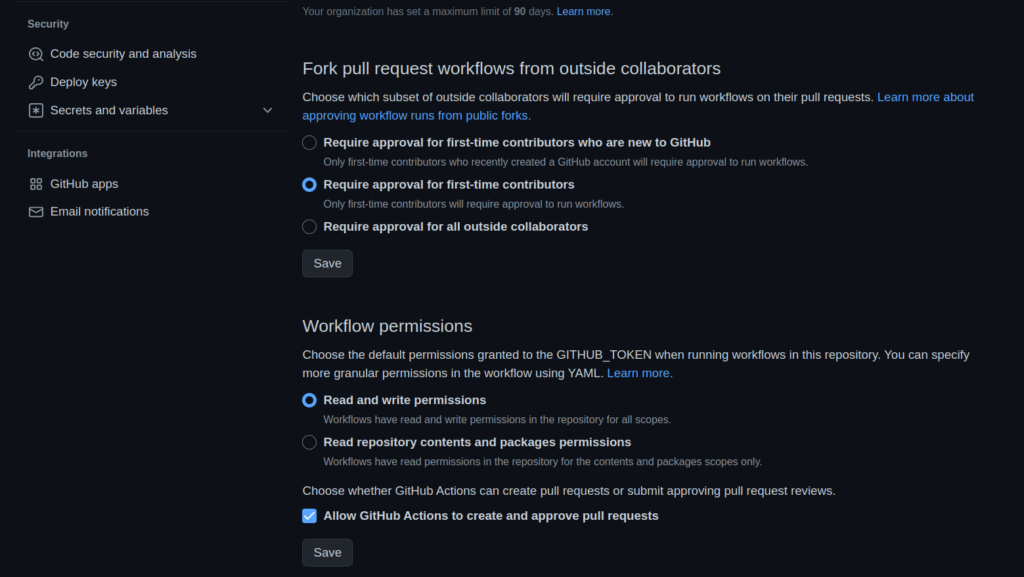
Deploying to GitHub pages using ghp import
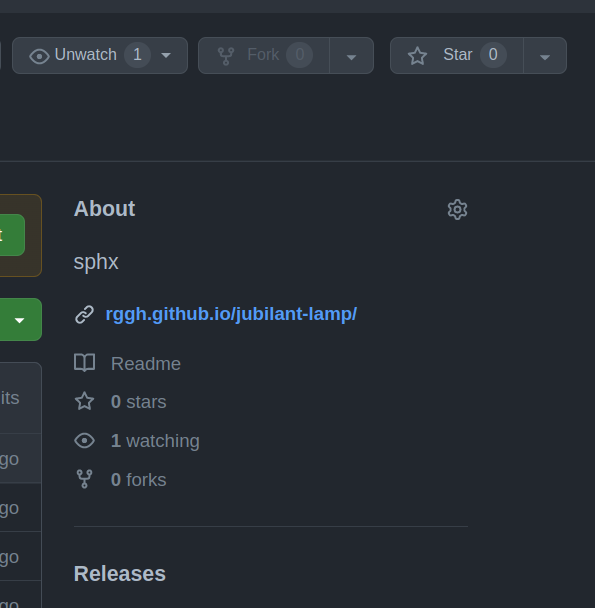
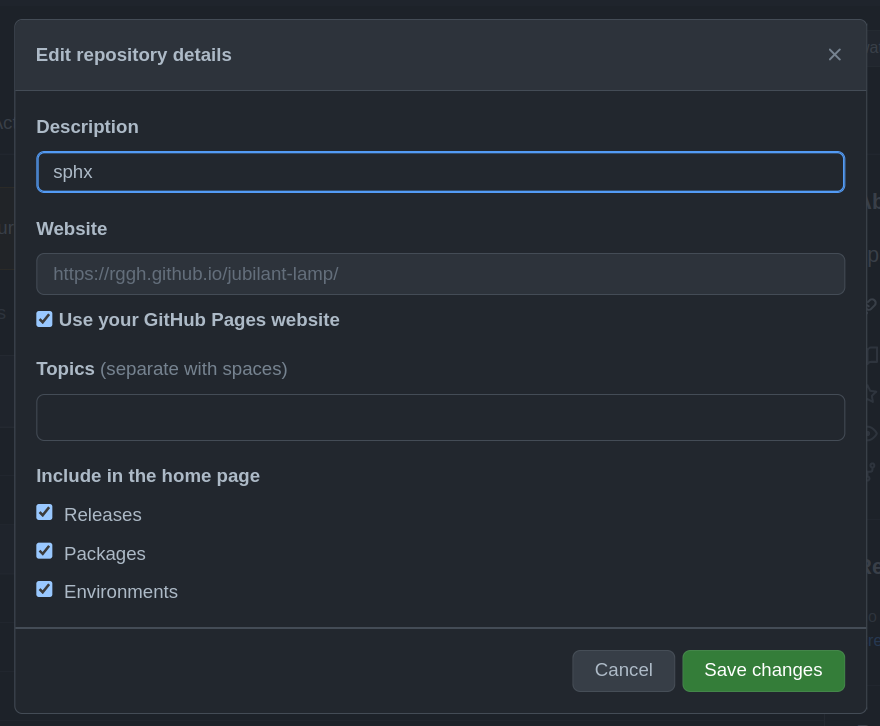
The workflow will create the files shown below and then shortly after, import them into GitHub pages.
      - name: Build HTML
        run: |
          cd docs/
          make html
      - name: Run ghp-import
        run: |
          ghp-import -n -p -f docs/_build/html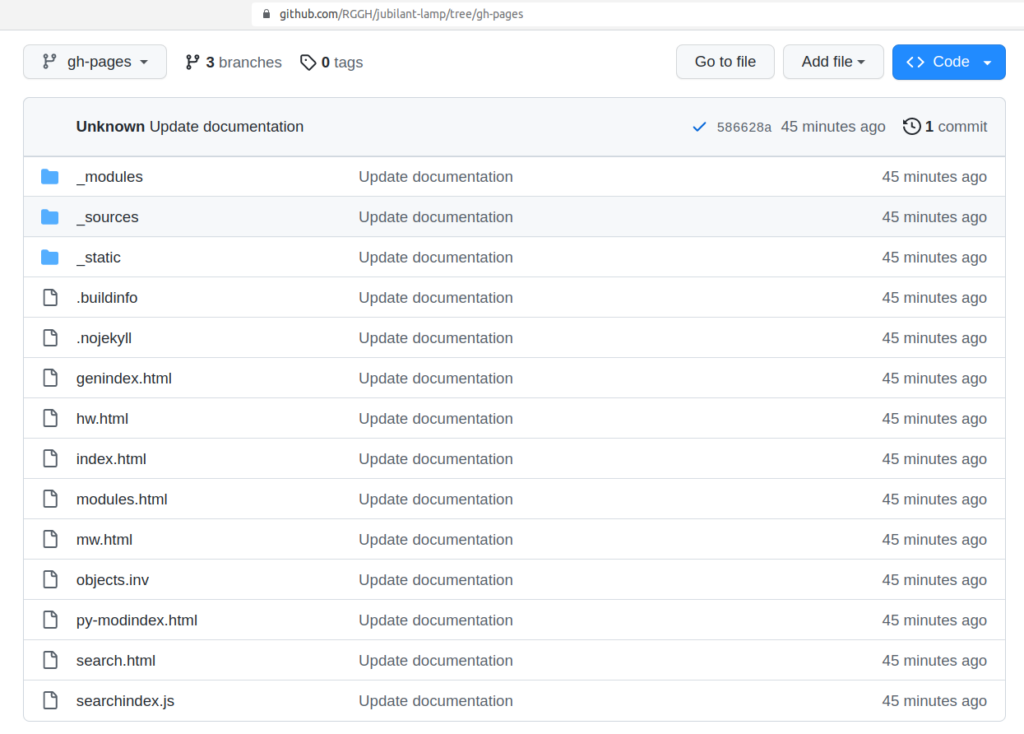
Using Sphinx
To understand how to use Sphinx to GitHub Pages via GitHub Actions let’s understand the Sphinx part a bit more.

Explain that it is to automate documentation of your code on GitHub pages each time you push to the remote git repository
I’ve covered this previously in this article here, so check that out before reading the rest of this page.
There was one ‘gotcha’ that I spent ages trying to sort however…
The Python code for the project that I was using for this trial were called “mw.py” and “hw.py”
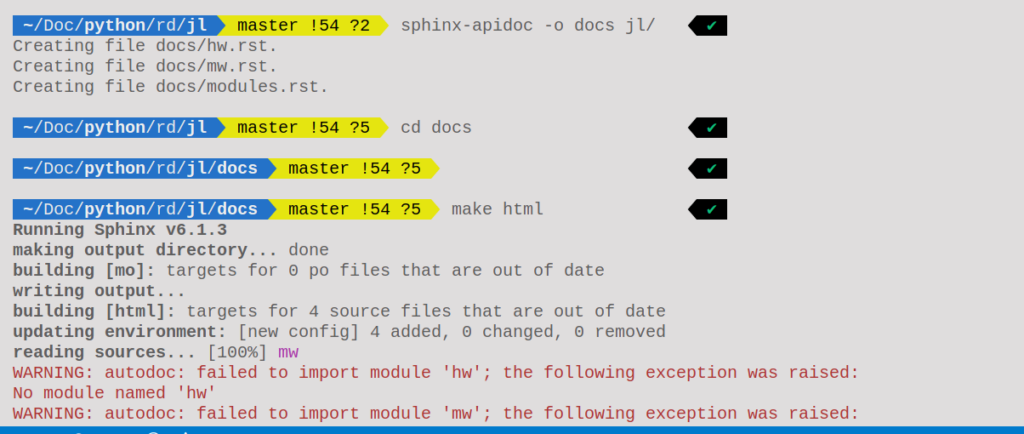
I kept getting this error though:
WARNING: autodoc: failed to import module 'hw'; the following exception was raised:
No module named 'hw'
WARNING: autodoc: failed to import module 'mw'; the following exception was raised:
No module named 'mw'
This was showing up when I ran `make html`
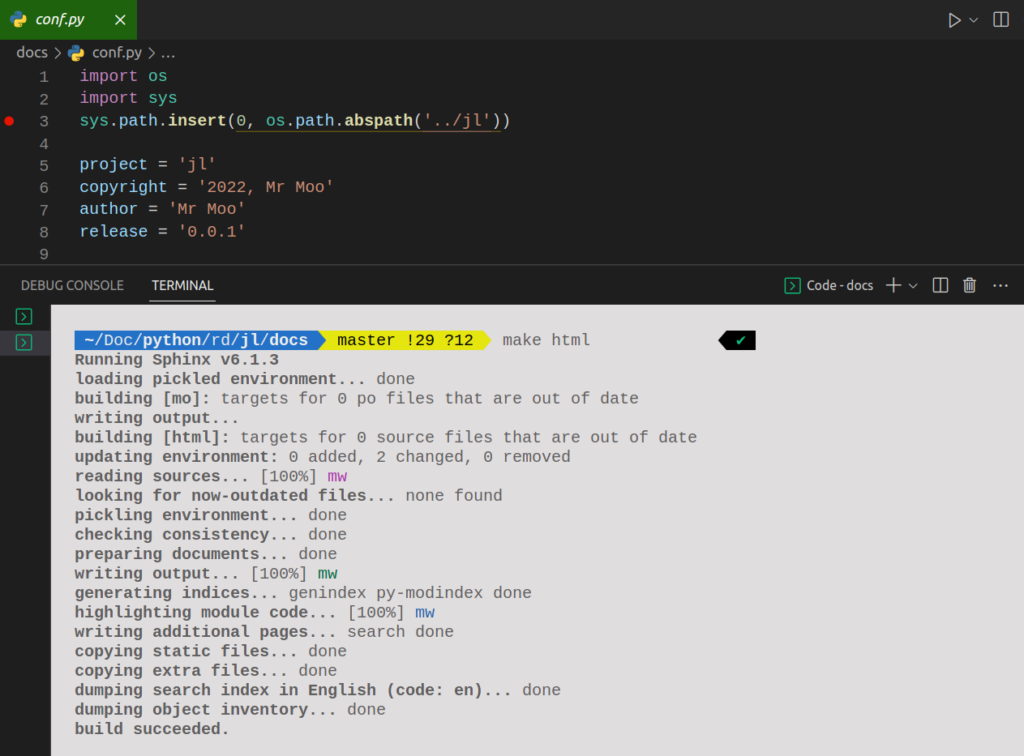
Once I adjusted the conf.py file to have abspath to include the directory of the python code it worked.
import os
import sys
sys.path.insert(0, os.path.abspath('../jl'))
*You’ll find most examples show a conf file with the abs path of sys.path.insert(0, os.path.abspath('..')) however, so pay attention to this if you get errors.
Adding additional Python files
So you have Sphinx installed, GitHub repo set up, the workflow is working and the GitHub pages are updating when you modify your existing code. But how do you add additional Python files?
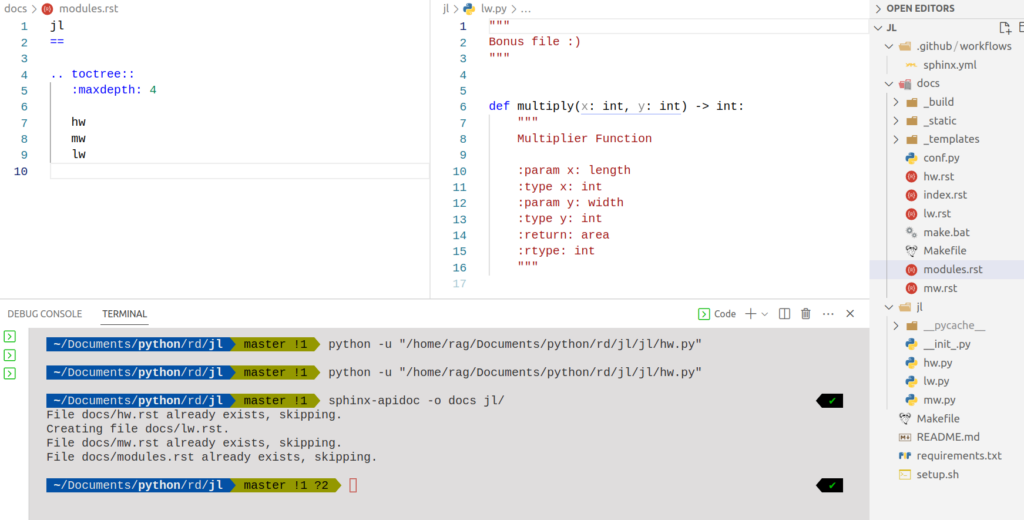
1: Create a new python file with some code in the same directory as the existing Python files
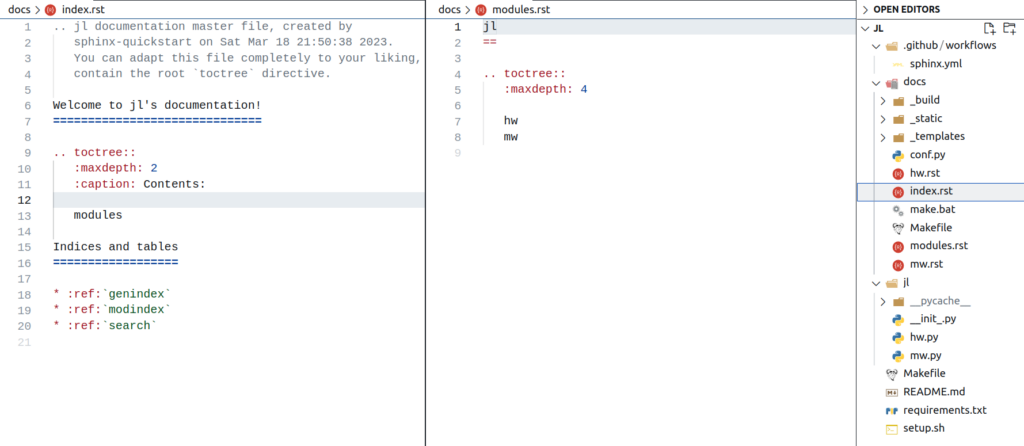
2: cd to the top directory and run sphinx-apidoc -o docs src/ where src/ is your source code directory. In my case I ran sphinx-apidoc -o docs jl/
3: Add the name of the Python file to modules.rst – but without the “.py” file extension however!
4: Commit and push to GitHub. *Note: You do NOT have to run “make html” again because the workflow runs Sphinx for you.
5: Wait a few mins and then check your GitHub pages and you will see the updated documentation. In my case a 3rd link appeared for the “lw” module.
Sphinx to GitHub Pages via GitHub Actions : Conclusion
This took me a few hours to get working, based on minimal prior experience, nevertheless what I built is a repo where the Documentation is dynamically create from the commit.
If you add more Python files to your project you will need to rerun sphinx-apidoc -o docs src/ where src/ is the directory containing your Python files.
*Rather than “src” it would be better to use your project name.
Tip: make sure “__init__.py” files exist in each directory where Python files are located.
I’d suggest experimenting with Sphinx and get it to generate documentation locally first before progressing to the GitHub workflow to generate it rather than jump in at the deep end!
Note: Even though GitHub actions create the html files you will still need Sphinx installed locally to help create the “rst” files and upload them, so run Sphinx to set this up on the computer you code on, and once you commit to the remote ‘master’ at GitHub the GitHub action will have the files it needs to recreate the same documentation and deploy it. Note if you use ‘main’ then edit the yaml file to match.
~/Documents/python/rd/jl master ⇣1 tree -L 2 1 ✘
.
├── docs
│ ├── _build
│ ├── conf.py
│ ├── hw.rst
│ ├── index.rst
│ ├── make.bat
│ ├── Makefile
│ ├── modules.rst
│ ├── mw.rst
│ ├── _static
│ └── _templates
├── jl
│ ├── hw.py
│ ├── __init_.py
│ ├── mw.py
│ └── __pycache__
├── Makefile
├── README.md
├── requirements.txt
└── setup.shThanks for reading, I wish you success with what can be a particularly confusing concept if you are new to it.
If you want a recommendation for web hosting, check out : https://webdock.io/
